In George Business, you have several tools that help you monitor activity on your accounts – Account Statements, Current Statements, and Transaction History. Each serves a slightly different purpose. In this article, you’ll learn how to use them and what options you have for working with your data.
Current Statements and Transaction History – Overview of Account Movements
Last Article Update 09.02.2026
You can keep track of your finances using Account Statements, Current Statements, and Transaction History.
- Account Statements can be downloaded at any time in a clear and well-structured format, and you can also choose how often you want to receive them. For more detailed information, including supported formats and download instructions, read the Account Statements article.
- Current Statements serve as official summaries of your current and card accounts for a selected period.
- Transaction History includes all completed transactions on your account. Below, you’ll find an overview of what Transaction History allows you to do.
Current statements
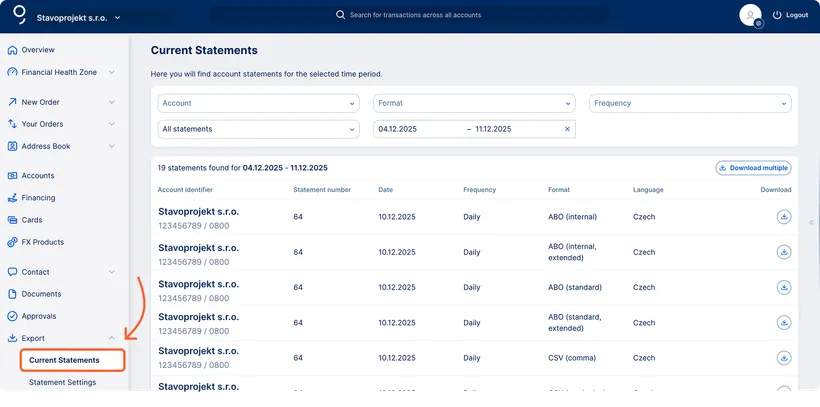
In George Business, you can download statements for multiple accounts in one place.
You can easily adjust the view of your statements depending on what you need – filter them by account, time period, frequency, or file format. Downloaded statements are marked with a green check mark for better visibility.
Loan statements in Current statements
In the Current statements section under the Export menu, you can also find loan statements for loan products in the workspace to which you have the appropriate permissions.
Loan statements are available together with other statements and can be handled in the same way – you can filter them by account or period and download them individually or in bulk.
Filtering statements
You can filter Current Statements freely – by account or date – or display only those that haven’t been downloaded yet. You can also use filters for frequency and file format.
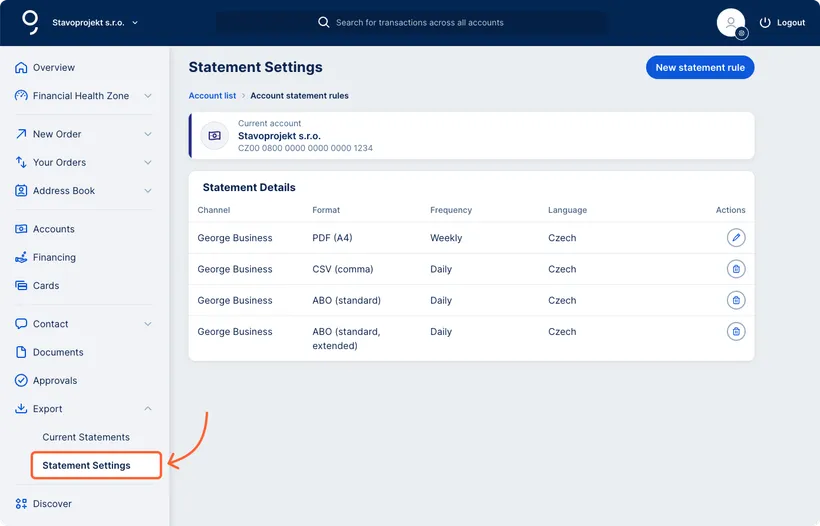
Setting up electronic statements
In George Business, you can set electronic account statements. In the left-hand menu, go to Export → Statement Settings and select the account you want to update.
Switching from paper to electronic statements
At any given time, there must be at least one active statement rule in PDF/A4 format on the account. If you are switching from paper statements to electronic ones, follow these steps:
1. Create a new statement rule.
2. Delete the existing rule using the bin icon.
The new series will automatically be assigned a new numbering sequence.
Please note that paper statement rules can only be deleted.
Transaction history
You can access transaction history from the left-hand menu: click Accounts, open a detail of a specific account, and then go to History.
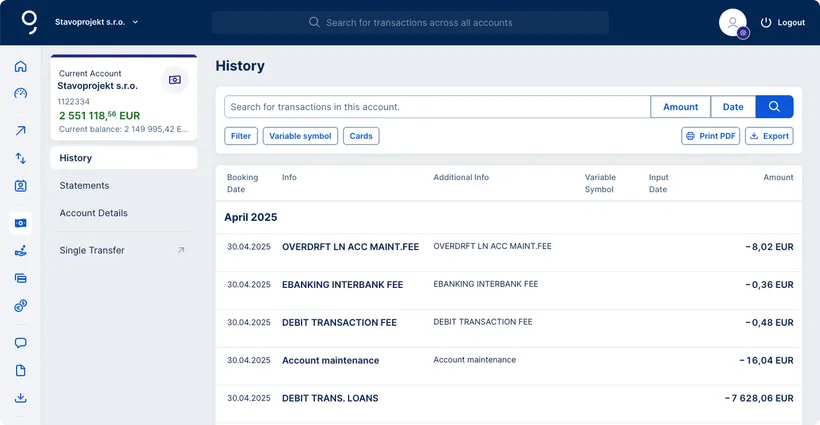
In the transaction history, you can choose the time period you want to display. This helps you to track the flow of funds in your account.
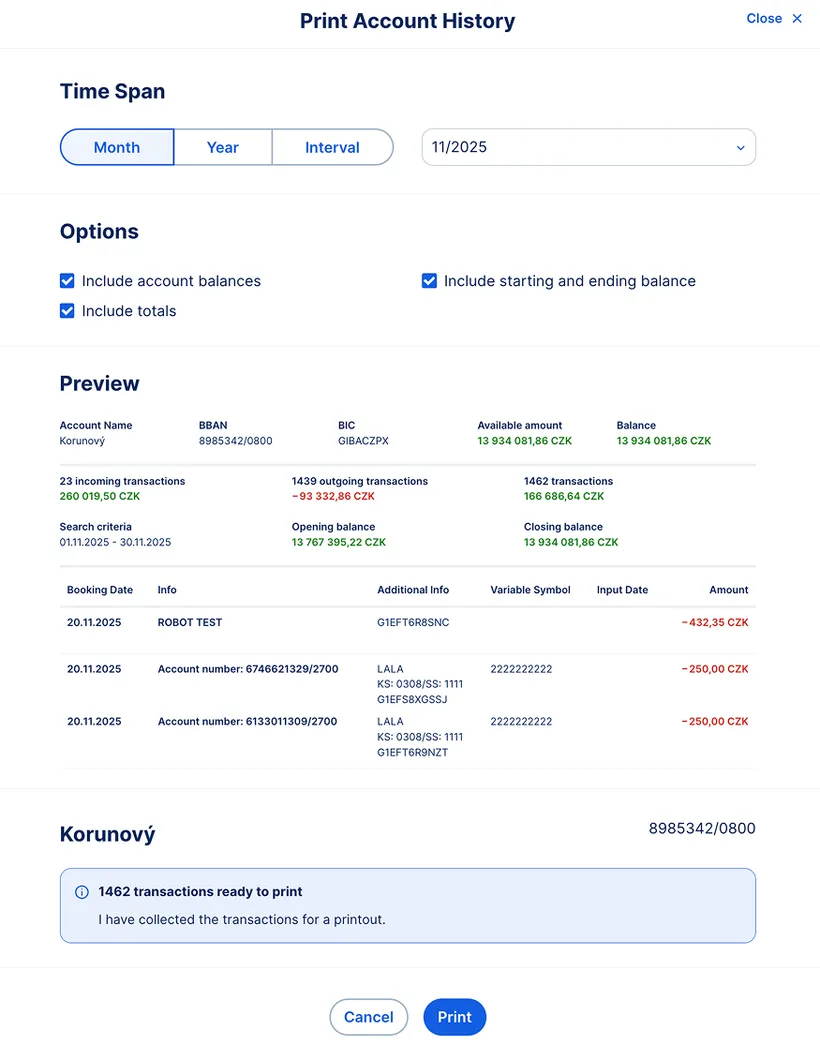
If you want to print your transaction history, you can choose what the printed report should include:
- Balances
- Total amounts
- Opening and closing balances (for transactions within a selected period)
The PDF printout shows transactions sorted in the same order as the account history – from newest to oldest. If you prefer a different sort order, use the "Export" button instead. Exporting allows you to download your transaction history in various formats (CSV, XLSX, or JSON) and use other advanced options.

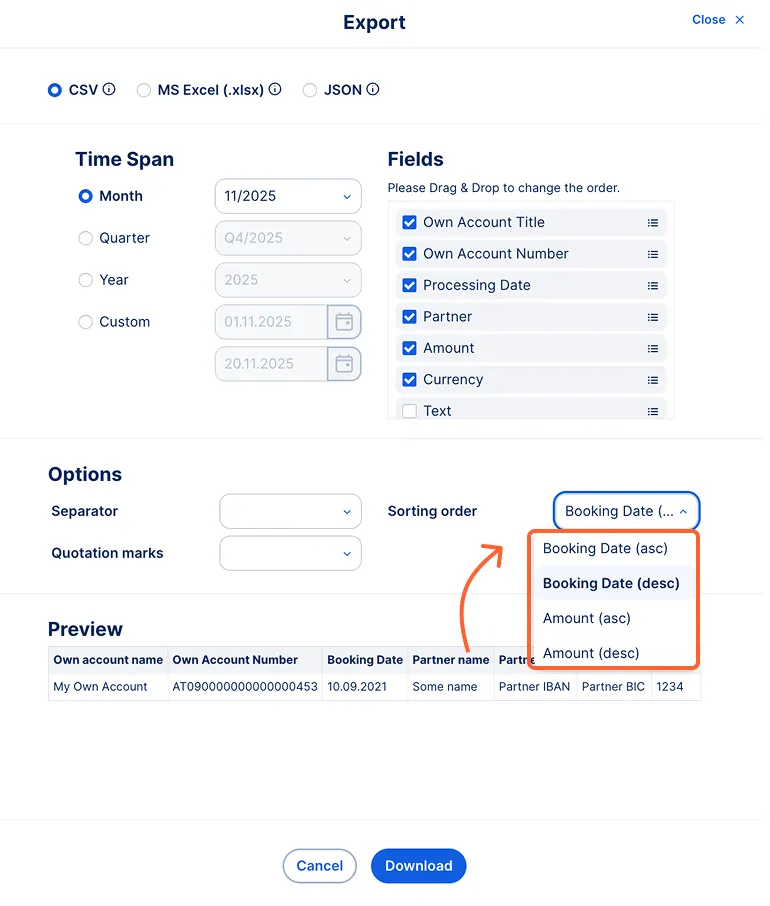
Export options
When you click the "Export" button, you can choose:
the file format (CSV, XLSX, or JSON),
the time period you want to export,
and the fields you want to include in the file.
You also have additional options, such as sorting of transactions.
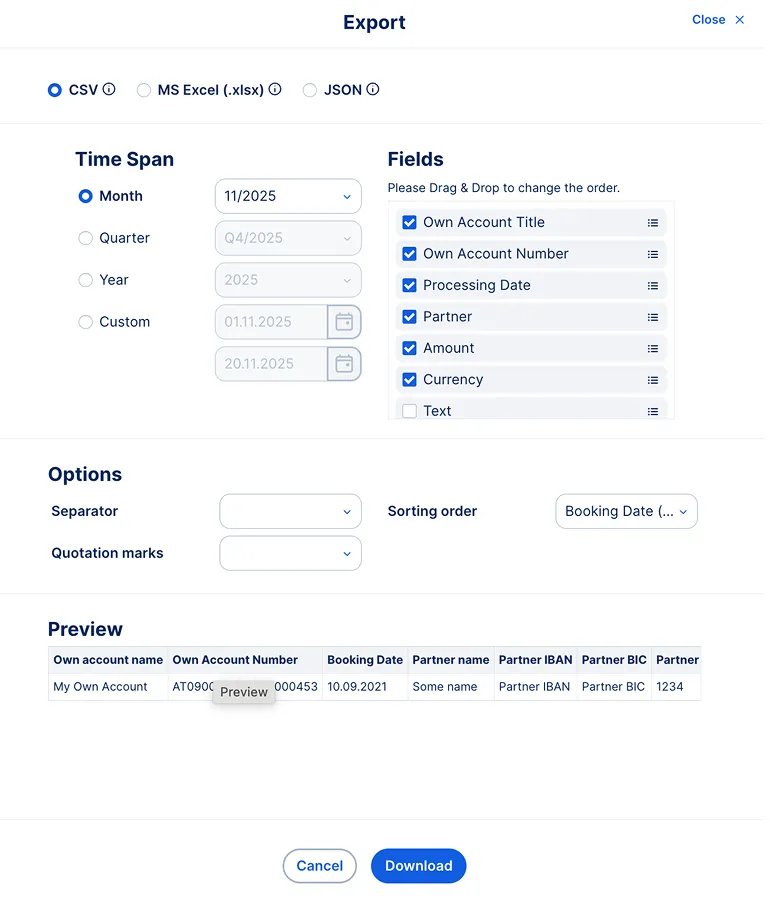
Transactions can be sorted by date or amount, either ascending or descending – giving you a clear, customized overview that makes your data easier to process.
If you often add notes to specific items, you can easily insert your own comments directly in Excel after downloading the file.