For administrator

Last Article Update 15.05.2026

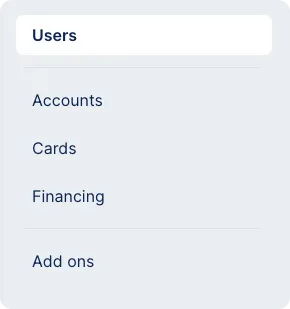
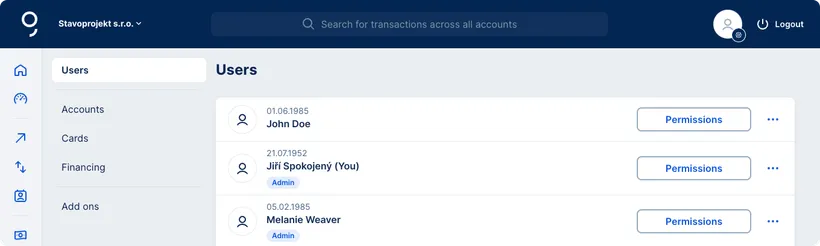
As the workspace administrator, you are responsible for the following functions:

  • Set user transactions limits
  • Manage permissions for authorised users
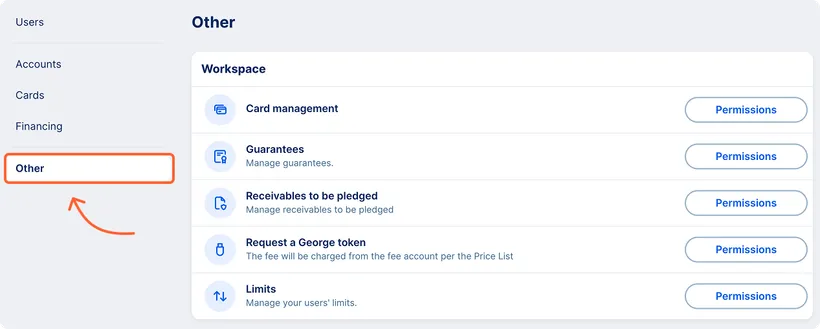
  • Manage product-specific permissions
  • Add or remove users from the workspace

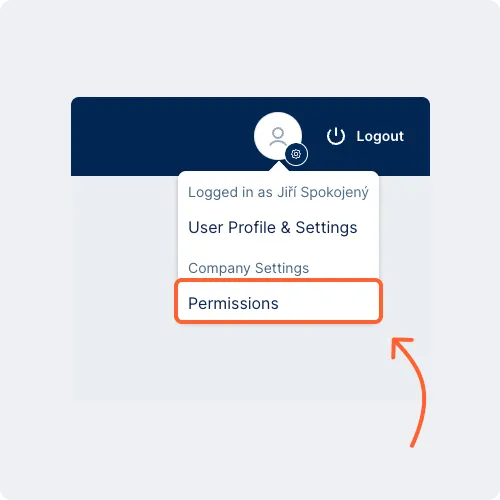
To manage permissions, limits and users, go to you Profile in the blue bar at the top right. Then select "Permissions" under "Company Settings" section. 

Permissions entry point Permissions entry point

When you select "Permissions", you'll see a list of all users with access to the workspace.

Section for administrators Section for administrators

Managing Users

To check or adjust a user's permissions, select the user from the list and click the "Permissions" button in their row. This will open a page with all  user's permissions, categorized by product type (Accounts, Cards, Financing tabs) or workspace-related tasks (Add ons tab). Access levels are shown using labels: full, partial, or no access.

Detail of permission Detail of permission

You can view detailed information about the user's permissions for a specific product by clicking the arrow icon  
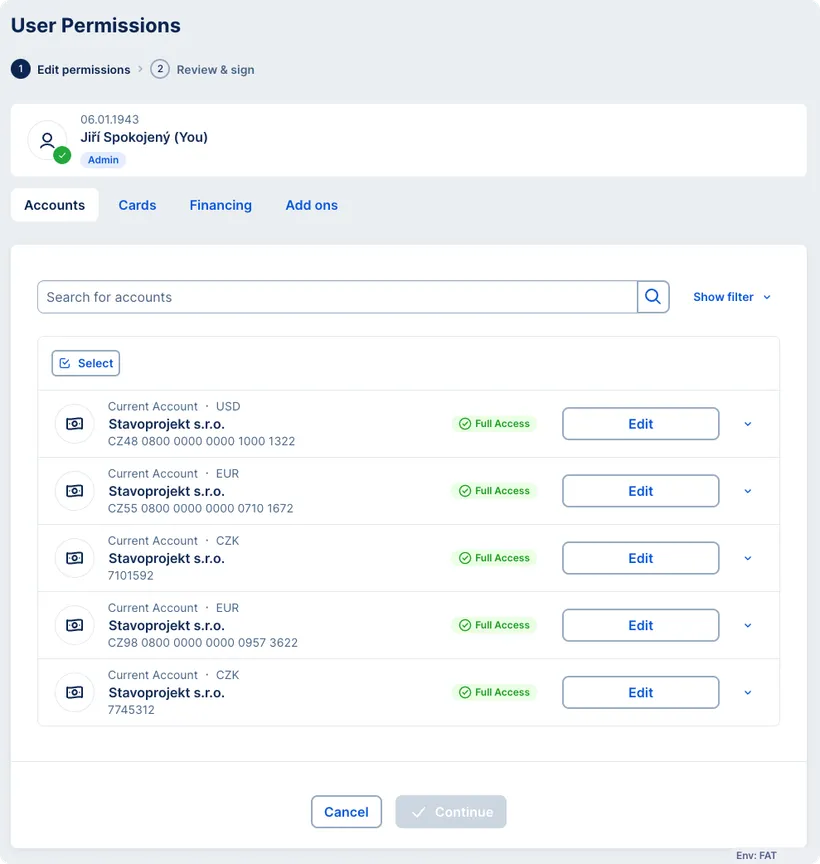
at the end of the respective row.

To change permissions, click "Edit". This opens a screen where you can set individual permissions.

Removing users

To remove a user, go to the "Users" section via the left-hand menu. Select the user and click the three-dot icon in the their row. Then click the button to remove the user.

Managing Products

To manage product level permissions, go to the products sections (Accounts, Cards, Financing) via the left-menu.

Managing products menu Managing products menu

After that, select a product (e.g. a current account) and click the "Permissions" button in its row. You can then check and adjust individual user access settings for that particular product by clicking the "Edit" buttons.

Managing Workspace

At the workspace level, you can set permissions for users. To manage these settings, go to the "Add ons" section via the left-hand menu.

Add ons section in the left menu Add ons section in the left menu

Through  the "Permissions" button on the relevant row, you will be taken to the overview of users for whom you can set permissions:

  • Manage cards and apply for new ones 
  • Permissions for guarantees:
        View issued and requested guarantees and announced guarantees
        Create and edit documents relating to guarantees
        Act in a binding manner towards the Bank in connection with guarantees 
  • Manage receivables to be pledged  
  • Request a George token 
  • Edit daily payment limits 
  • Permissions for Financial Market Products:
        View Financial Market Products
        Arrange Financial Market Products
        Confirm Financial Market Product confirmations

Co-signing by Administrators

If you are an administrator in a workspace where joint authorization with another administrator is set up, all changes you make in the “Permissions” tab will require co-signing by another administrator. This also applies to the Administrator with restrictions role.

You can find an overview of all co-signing requests in the left-hand menu under “Approvals”. This section shows both pending requests awaiting approval and historical requests. In the request detail, you can view all information related to the submitted change.

Co-signing by Administrators Co-signing by Administrators